Make a Party Pinata at Home (Easy DIY for Kids’ Parties)
One of the all-time favourite party games my kids always request is a party pinata. They work with almost any theme, the kids love the treats, and let’s be honest – everyone secretly enjoys being allowed to hit something.
Over the years, I’ve made some pretty amazing DIY pinatas that were fully customised for my birthday boy or girl. But as life (and business) got busier, I learned how to adapt my pinata-making process so it’s faster, easier and still looks great.
The good news? Making a DIY pinata for your child’s birthday party doesn’t need to be hard or time-consuming.
Below, I’m sharing two different DIY pinata options:
- A simple, quick DIY pinata made from a cardboard box – perfect for busy parents
- A more advanced character-shaped pinata for themed birthday parties
The pinata wrapped in brown paper with a teepee was from Donte’s camping-themed 9th birthday party. The purple Supergirl box pinata was from Isla’s superhero-themed 5th birthday party.
Not bad for about 10 minutes and a nappy box.

How to Make a Simple Pinata Using a Cardboard Box
This is my go-to option when I want something quick, sturdy and easy to customise for any party theme.
What You’ll Need
- Cardboard box (any size)
- Packing tape
- Wrapped lollies or small treats
- Satin ribbon
- Wrapping paper or coloured paper
Step 1: Prepare the Box
Choose any clean cardboard box. Tape all sides securely with packing tape, leaving the top open. I usually just add extra tape to the bottom for strength.
Step 2: Fill with Treats
Fill the box with wrapped lollies or any small edible or non-edible treats of your choice.
Step 3: Seal the Top
Once filled, seal the top of the box shut with more packing tape.
Step 4: Add Hanging Ribbon
Cut two long lengths of satin ribbon and double them over for strength. Wrap one around the width and one around the length of the box so all ends meet in the centre.
You’ll end up with four doubled ribbon ends (eight strands total) to tie into a strong knot at the top.
Step 5: Create the Hanging Loop
Add another long piece of doubled ribbon to the knot for hanging. The length will depend on how low you want the pinata to hang.
Step 6: Decorate Your Pinata
Now for the fun part. Wrap the box in matching paper and add a simple decoration or sticker to suit your party theme.
Keeping things time- and budget-conscious, I often just use themed wrapping paper and one standout detail – it still looks great.

Your simple DIY party pinata is now complete.
One of the best parts? These homemade pinatas last much longer than store-bought ones. At one of our parties, it took about 40 minutes and 20 kids of varying ages to crack it open – and they loved every second.

Advanced: How to Make a Character-Shaped Pinata
This next tutorial shows the Minions DIY pinata I made for Donte’s Minion-themed birthday party. It was a little more work – but absolutely worth it.
I didn’t take as many step-by-step photos as I should have, but I’ll explain the process clearly so you can adapt it for your own character pinata.

What You’ll Need
- Cardboard box
- Sharp knife (for cardboard)
- Packing tape
- Wrapped treats
- Satin ribbon
- Wrapping paper or crepe paper
- Glue
- Paint and decorations
Step 1: Shape the Box
Tape the bottom of a rectangular box, then carefully cut and round the top edges to form your character’s head. Keep the bottom simple for strength.
Step 2: Secure for Hanging
Poke holes near the top and thread satin ribbon through for extra strength. Tie securely in the centre and add extra ribbon if needed for hanging height.
Step 3: Fill with Treats
Fill the box with wrapped lollies or small treats.
Step 4: Decorate Your Character
Wrap the pinata in crepe paper, then build up character details using coloured paper, ribbon and paint.
For my Minion, I used yellow and blue crepe paper, added a printed Minion eye template, painted a smile, and attached cardboard arms and feet.

More DIY Party Pinata Ideas
Over the years, I’ve made plenty of pinatas for our kids’ birthday parties. Here are a few more variations using the same techniques.
Minnie Mouse Ears Pinata
This Minnie Mouse pinata was made for Isla’s 2nd birthday. I cut the classic silhouette, decorated with pink crepe paper, added her name, and finished it with a crepe paper bow.
You can watch a bow tutorial here.

Ninja Turtles Party Pinata
This Teenage Mutant Ninja Turtles pinata was the star game at Donte’s Ninja Turtle-themed party. Crepe paper was layered in circular motions, finished with a blue mask for Leonardo.

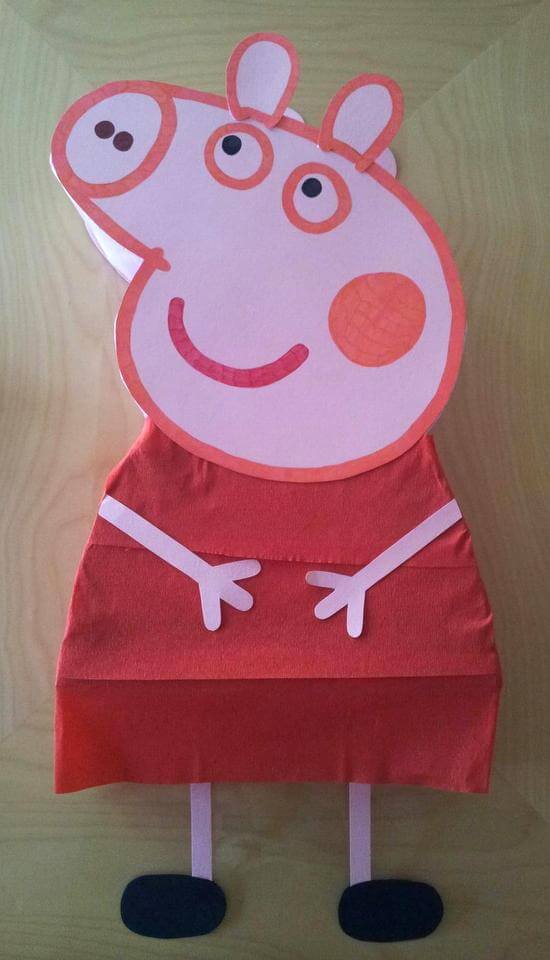
Peppa Pig Party Pinata
This Peppa Pig pinata was made for my cousin’s daughter. Coloured card, markers and crepe paper brought her to life.
Customise Your DIY Pinata
Character pinatas take a little more time, but the end result is always worth it. With cardboard, crepe paper, glue and ribbon, you can turn a simple box into almost anything.
Hang your DIY pinata securely, line the kids up, and let the fun begin.
If you’re looking for more DIY party ideas, visit Parties by Katie J for helpful tips, recipes and inspiration.
And if you’d prefer to save time, head over to Katie J Design & Events to explore our range of personalised party decorations and supplies. We’re based in Brisbane, QLD and ship Australia-wide, with international shipping available to the US and New Zealand.

Frequently Asked Questions
How long does it take to make a DIY pinata?
A simple box pinata can be made in about 10–15 minutes. Character pinatas take longer depending on detail.
Are DIY pinatas safer than store-bought ones?
DIY pinatas tend to be sturdier, which means they don’t break too quickly and reduce scrambling for treats.
What can I put inside a pinata?
Wrapped lollies, small toys, stickers, or non-food treats all work well.
Do you sell personalised party decorations?
Yes. At Katie J Design & Events, we design and print personalised party decorations in Brisbane, QLD and ship across Australia, the US and New Zealand.


Leave a comment (all fields required)